Tuesday, July 26, 2011

You say Tomato, I say Mozzarella

Freshly made Mozzarella


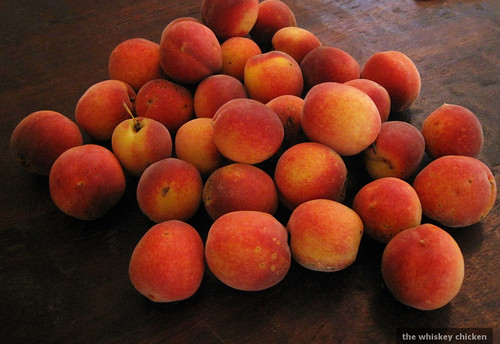
  This time of year is the pinnacle of tomato season. And with an overabundance of those acidic red orbs, comes a plethora of dishes that include basil and mozzarella. Now, while I admit that this trio has been overused much in the same way prosciutto and cantaloupe/asparagus has (and oh how it has...), there is a very good reason for it. It's tasty. You may be thinking Caprese salad, I am thinking pizza, but I am always thinking pizza. I like all sorts of bizarre wonderful toppings, but a classic Margherita is tough to beat.
  You could always spring for the stuff packed in water that's $9 a container, or you could make your own. Now, there are a few specialty ingredients needed to make fresh mozzarella, and you will probably need to order them off of the Internet. But most will last you for a long time, aren't terribly pricey, and can be used to make countless other cheeses. The New England Cheese Making Supply Co. is my personal favorite for such business.
  I would like to share with you how to make crazy delicious mozzarella at home, but first, I want to answer a few burning questions I know you have always had about the ingredients to come.


Q. What is rennet? Why the &*@! is it in my cheese?

A. Rennet is a mixture of enzymes that are traditionally derived from the stomach of a calf (or kid, or lamb) that aid in the coagulation of cheese, causing the milk to separate into curds (milk solids/future cheese) and whey (leftover liquid). It is usually the byproduct of the veal industry. Rennet can be bought as either a liquid, powder, or tablet. There is also vegetable rennet, microbial rennet, and Chymosin (or genetically engineered rennet). Vegetable rennet can be made from a number of things such as thistle and nettle, but is most commonly mold based for commercial rennet. Microbial rennet is also mold based, and can be very difficult to use in aged cheeses due to it's bitter taste. Chymosin is a rennet who's origins start as cow genes that are then spliced into bacteria to create a genetically modified rennet that can be considered suitable for vegetarians. Junket rennet tablets are a very weak form of rennet that will not work for aged cheeses. Besides, it has Junk in the name.


Q. What is Calcium Chloride?

A. Calcium Chloride is a salt solution that is used to restore the balance of calcium that is lost to heat treatment in milk. It helps to speed up the coagulation process when rennet is used.


Q. What is cheese salt? Sounds delicious...

A. Cheese salt is simply an noniodized coarse salt that is used to flavor the cheese. It is not cheese flavored salt. Kosher salt can also be used, as long as it is iodine free. Iodine inhibits lactic bacteria and slows down the aging process.
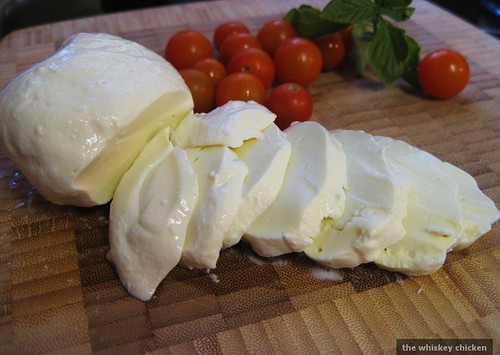


Fresh Mozzarella


Ingredients

1 1/2 teaspoons calcium chloride dissolved in 1/2 cup cool water
1 gallon pasteurized whole milk (if using raw milk, skip calcium chloride)
1/4 teaspoon liquid rennet dissolved in 1/4 cup cool, nonchlorinated water
1 teaspoon cheese salt


Special Equipment

large stainless steel pot
stainless steel slotted spoon
thermometer
heavy duty latex or rubber gloves


Pour milk into pot over medium/low heat.
When milk reaches 55 degrees, stir in calcium chloride mixture.
Heat milk to 90 degrees (milk will start to curdle).
Slowly stir in rennet mixture in an up and down motion while heating milk to 100 degrees.
Turn off heat.
When the curds get larger, start to pull away from the pot, and the whey is fairly clear, they are ready (3-5 minutes).
Using the slotted spoon, scoop out curds into a microwave safe bowl.
Press the curds to expel as much of the whey as possible.
Microwave the curds for 1 minute.
Put on gloves (trust me) and drain off whey, then knead curds as you would dough. Very, very hot dough.
Microwave two more times for 35 seconds each, kneading after each time.
Add salt after last heating and knead until curds stretch like taffy.
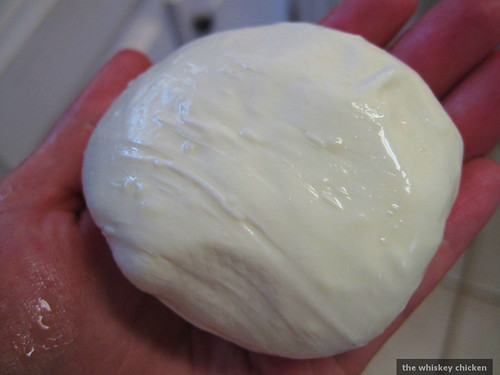
Roll curds into balls or squeeze in between the hole of your index finger and thumb as if you were making a cheese balloon, then pinch with thumb.
Eat right away while still warm and gooey, or store in water in refrigerator for up to a week.


Fresh Mozzarella
Just add face


Monday, July 25, 2011

Friday, July 22, 2011

Look Ma! No cans!


  As you may have gathered from my previous post, peaches are a favorite summertime staple of mine. But one of my other true loves? Cherries. Cherries, cherries, cherries. When the season is right, I can't get enough. It is terribly ironic of course that cherries are one of the few things that don't grow well in Georgia, our winters are just not cold enough. So when available and perfectly ripe, I am perpetually broke.
  It was around this time last year that I started to wonder, "Why don't people make fresh cherry pies?". This kind of thinking has gotten me into trouble before. But it just didn't seem to make sense. The only cherry pie I had ever been acquainted with came out of a can and was a bizarre neon red color. Not good eats. After that epiphany, I was hell bent on making one. And I did. And it was amazing! I made another one this year, equally amazing! No more canned goopy red stuff!


Fresh Cherry Pie


Ingredients

For Filling:
7 cups fresh beautiful red cherries, pitted*
1/2 - 3/4 cup sugar ( this depends on how sweet your cherries are. Really sweet? Go with less. )
2 Tablespoons cornstarch or 4 Tablespoons flour
1 Tablespoon lemon juice
1/4 teaspoon salt
1/4 teaspoon cinnamon
1/4 teaspoon nutmeg
pinch of clove
pinch of ground ginger
1/2 vanilla bean, scraped


Combine all ingredients and set aside.


For Pie Crust:

2 1/2 cups flour
1 teaspoon salt
1 heaping teaspoon sugar
2 sticks cold butter, cut into pieces
1/4 - 1/2 cup ice cold water
Egg wash ( 1 egg + 1 Tablespoon water beaten together ) and sugar for topping crust


Preheat oven to 400 degrees.
Combine flour, salt, and sugar in a large bowl.
Cut butter into dry ingredients with a pastry knife, fork, or food processor until mixture is coarse and butter resembles small peas.
Add ice water, a Tablespoon at a time, until dough just starts to form.
Divide dough in half, wrap in plastic wrap, and refrigerate for at least 1 hour.
Roll dough on floured surface into 14" rounds.
Line bottom of pie plate with dough, fill with cherry mixture, and top with remaining dough.
Trim edges of dough with kitchen shears and crimp with fingers or fork.
Cut several holes into top of pie, brush with egg wash, and generously sprinkle with sugar.
Feel free to garnish with leftover dough scraps formed into adorable shapes ( like cherries! )
Place pie dish onto baking sheet and place on lower 3rd of oven.
Reduce heat to 350 degrees and bake 1 1/2 hours or until fruit bubbles and crust is golden brown.


*Pitting cherries sounds like a complete pain in the ass, but it's actually quite fun if you have a good pitter (Beware: Just don't wear your favorite shirt, when all is said and done, you will look like the perpetrator of a gun shot homicide ). Invest in one that isn't total crap and it will serve you for years to come. Can be used for olives too!


Cherry Pie
*No cans were harmed in the making of this pie*


Tuesday, July 19, 2011

Georgia Summer

Beautiful Pasture


  Ah summer. There really is no other season quite like it. Amongst the endless complaints of southern heat ( and believe you me, Georgia is hot ) and "skeeters", there is so much to love about summer. No other time of the year can you find so many wonderful things wrapped up into one fair package: warm nights, glowing fireflies, nightly grilling, fireworks, and an endless bounty of fresh produce. Tomatoes, squash, corn, watermelon, okra, field peas, cucumbers, and blueberries. These are all great things, but the best by far are peaches! It is not officially summertime until you have had a warm peach eaten out of hand over the sink, juices running down your chin and arm.
  So when the brand new Grant Park Farmers Market hosted a peach cobbler contest, how could I resist it? Now I admit that I didn't win any awards for my cobbler, but for it being my first one ever, I was pleased as pie...er cobbler. I have had much practice with blackberry cobblers thanks to the rambling patch in my front yard, but had never tried it before with peaches. I suppose I love them so much on their own that I don't think too often about transforming them into a dessert.
  For this recipe, I wanted to try something that was both classic and unusual. So naturally, I topped the cobbler with a biscuit crust, only it was flavored with lemon, rosemary, and cornmeal. I also served a vanilla custard sauce on the side that too incorporated rosemary.


Cornmeal Biscuit Topped Peach Cobbler with Rosemary Infused Vanilla Sauce


Ingredients

For Cobbler: 7 peaches, peeled and sliced
                      1/4 cup sugar
                      1 teaspoon cornstarch
                      1 Tablespoon lemon juice
                      pinch of salt
                      pinch of cinnamon


Preheat oven to 425 degrees.
Toss peaches with sugar and let stand for 30 minutes to expel juices.
Drain off juices, reserving 1/4 cup of liquid.
Combine cornstarch, lemon juice, salt, and cinnamon with juice and toss with peaches.
Pour into baking dish and bake for 10 minutes.


meanwhile, make the biscuit topping


For Biscuit Topping: 3/4 cup flour
                                  1/4 cup cornmeal
                                  3 Tablespoons brown sugar
                                  1 1/2 teaspoons baking powder
                                  1/4 teaspoon salt
                                  1/2 teaspoon lemon zest, minced
                                  1/4 teaspoon fresh rosemary, minced
                                  3 Tablespoon cold butter
                                  1/2 cup cold buttermilk
                                  heavy cream and sugar for topping biscuits
                               

Combine flour, cornmeal, sugar, baking powder, salt, zest, and rosemary.
Cut in cold butter using pastry knife, fork, or food processor until mixture is coarse and butter resembles small peas.
Add buttermilk and mix just until dough comes together.
Take hot peaches out of oven and top with spoonfuls of biscuit mix.
Brush biscuits with heavy cream and generously sprinkle with sugar.
Bake for 25-30, or until peaches are bubbling and biscuits are golden brown.


For the Sauce: 1 cup whole milk
                         1 sprig fresh rosemary
                         3 egg yolks
                         7 Tablespoons sugar
                         1/2 vanilla bean, scraped


Add milk and rosemary to small saucepan and bring to a low simmer, stirring often.
Remove rosemary.
Meanwhile, in a medium bowl, whisk egg yolks, vanilla, and sugar together until a ribbon forms when the whisk is lifted from the mixture.
Whisking constantly, slowly pour a small amount of the hot milk into the egg yolk mixture.
Pour egg yolk mixture into saucepan with remaining milk.
With a wooden spoon, stir constantly over low heat until mixture thickens.
The sauce is finished when you can dip a spoon into it, then draw your finger over the back of the spoon and have a track remain that is almost free of sauce.
Serve warm, chilled, or at room temperature.


Peach Cobbler
GA Peach Cobbler